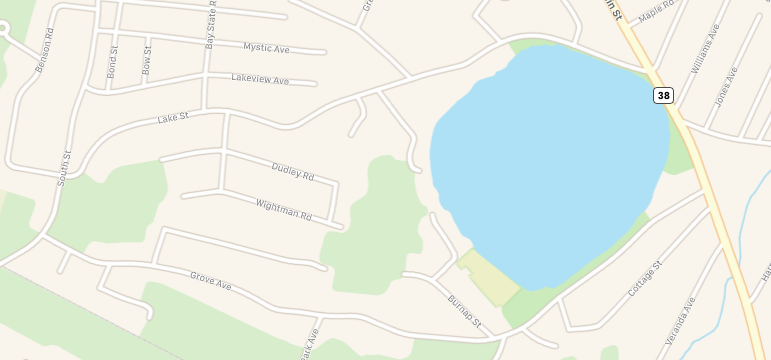
After a few too many close calls, I approached the town about making our street and another into one-way lanes. A counter-clockwise, 1.7 mile loop around the lake.
Silver Lake, bounded by Main, Lake, and Grove
The town said “no” for some very good reasons. I knew they would, but I had to give it a try. They paid the courtesy of taking it seriously, giving me a meeting with various officials, and explaining the reasons.
I had put an actual proposal together in case this went further. I include it here for posterity. Read it here: Better Traffic Around Silver Lake
Living where we do, with a high water table, houses are obligated to have a large hole in the floor of the basement called a “sump“. For those lucky enough to not know, a sump’s job is to collect groundwater before it seeps up through the floor of the basement. You then evacuate the water with a pump, colloquially (and quite logically) known as a “sump pump”.
A sump pump is a replaceable part. The typical lifetime is supposed to be around ten years, give or take.
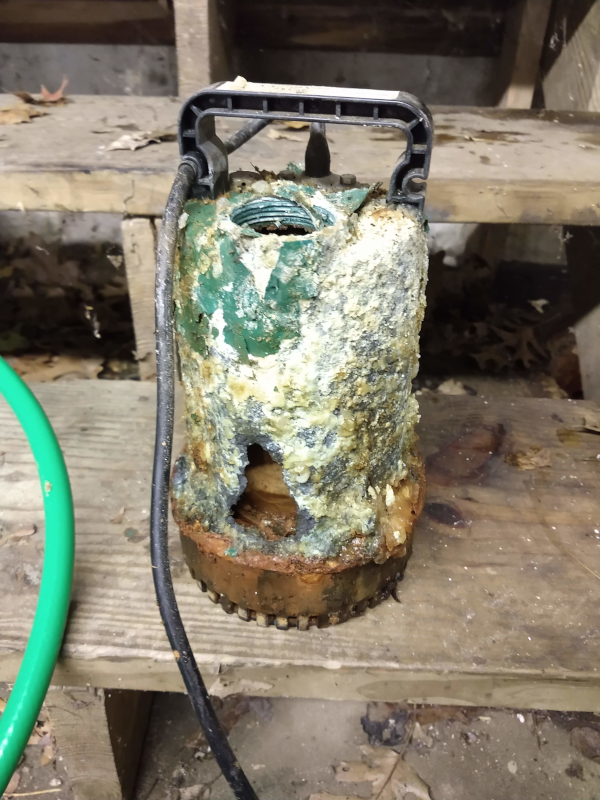
We last replaced our pump in 2014. I purchased a replacement unit from “Watchdog” that proclaimed it’s longevity, speed, and reliability. This is that same unit, a mere five years later:
Notice the hole in the side of the housing. It was not there when I purchased and installed the unit.
The unit continued to work in some condition, until it didn’t. It completely failed during a heavy December rainstorm this weekend. I came into the basement early Saturday morning to find ankle-deep water on the floor.
Woe unto the person who does not have a water alarm or redundant standby sump pump. That person would be me.
The pump is now replaced with a unit from a different manufacturer. Hopefully this one stands up to the elements a little better. We’re working on a water alarm as well.
Ah, winter in New England. Go home, winter, you’re already drunk and it’s barely December.
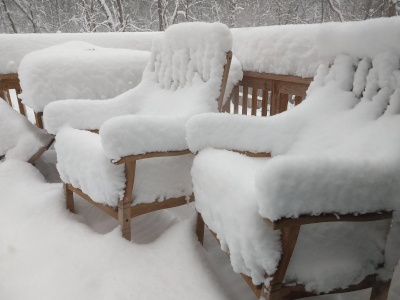
Last week we had a snowstorm and we were home-bound for three days. School was cancelled on Monday and Tuesday. I worked from home both days and slowly dug out in the afternoons.
We finally leveled out with over a foot of snow
A week later, temperatures reached 60° F. I was walking around in shorts and flip-flops. (I might be weird, but you have to admit that it wasn’t weather-inappropriate.) The clouds dropped two inches of water on us. With nowhere for the water to go, there are puddles and ponds everywhere.
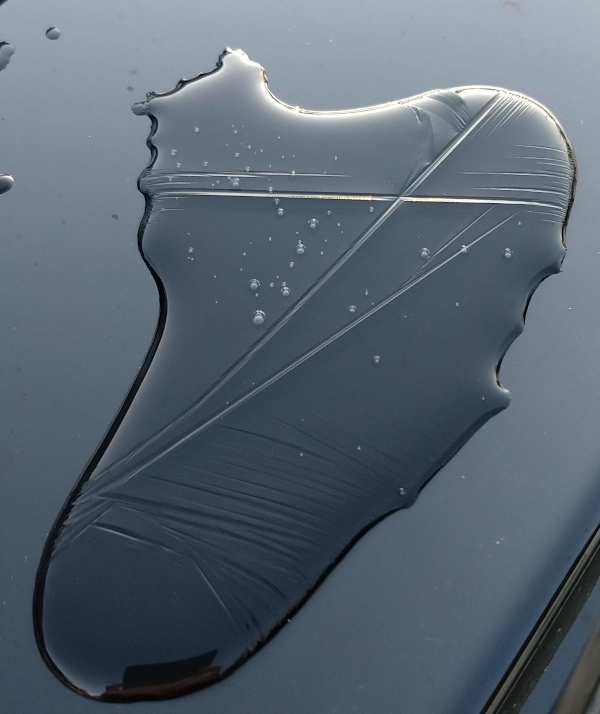
Last night, the temperature rapidly dropped, the rain turned to snow, and we got a couple or more inches. At least the end of the day cleared up with some sun. The snowmelt, which became treacherous as night fell, was downright beautiful for a while.
This water on the back of my car hadn’t finished freezing when I walked by.
Tonight, as I left the house to take the dog for an icy, slippery walk, I saw signs that we had some visitors during the day. A hawk snatched a meal from our front yard. Meghan left our Thanksgiving bundle of corn out for the birds and squirrels; it seems that we’re feeding the whole neighborhood instead.
Some small animal and a hawk came to our front yard expecting a meal. Only one of them was disappointed.
By this weekend we’re expecting to be back in the 50s with more rain. The rollercoaster that is our local weather continues. Whee!
I haven’t been posting much lately. Lets see what I’ve bee up to:
I’ve repaired 6 Chromebooks this week. There will be more tomorrow.
Apple is replacing a damaged iPad because I am wicked polite and prepared with documentation.
I’m not going up the 20′ ladder. Just no.
I’ve finished yet another stocking, except for the name. I’m putting it off because I’m not sure about placement. Probably, I should make it easy to remove and change if they want to.
Accidentally ruined my favorite hiking boots.
Took some pictures.
Knit a hat.
Bought Christmas cards. I’ll start filling them out as soon as I’m done with the stocking.
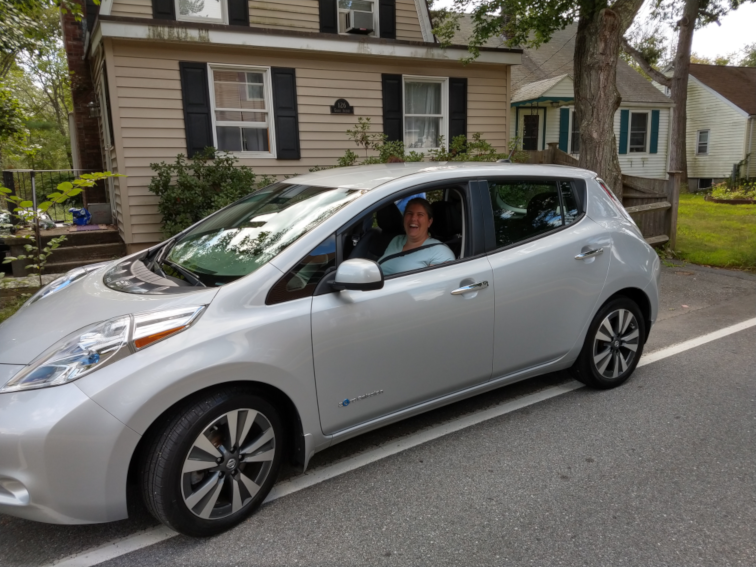
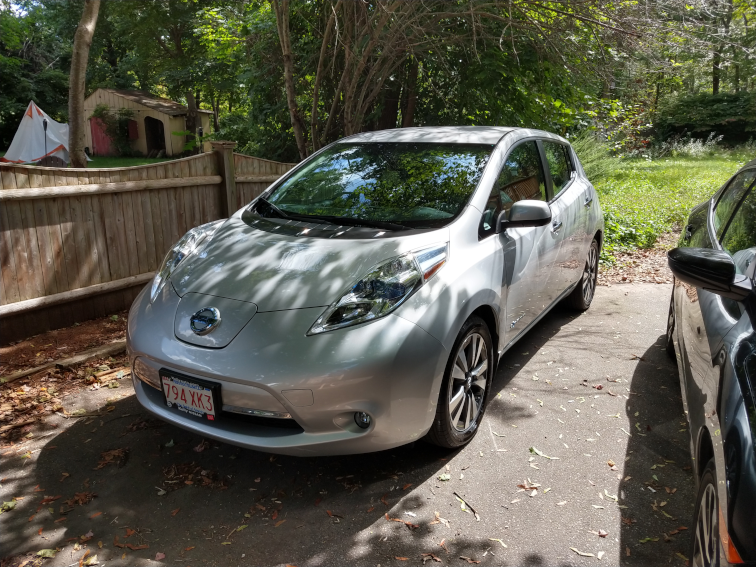
Meghan got a new job here in town a while back. More to the point, it’s two miles away.
I realized after a while that her car wasn’t really getting a chance to get up to operating temperature very often, even in the middle of summer. She makes several trips throughout the day to various buildings around town, but they’re rarely more than a couple of miles per hop.
This is the worst-case scenario for a gasoline-powered car. Her mileage suffered considerably: she was barely getting 20 mpg. I knew that the car would shortly show signs of fast aging — this is part of the “severe driving” section of the manual.
After hemming and hawing a bit, we decided that the best way to protect our asset would be to go electric. (I can’t say “protect our investment” because, lets face it, cars are not investments.) Meghan is the best-case scenario for an electric: lots of starts and stops (which lets regenerative braking recapture lots of energy) and no range anxiety since she’s never far from home.
We did our research, tried out a few cars, and finally found a good match.
Just finished a 20 mile bike ride with Meghan. We’re sitting in a McDonalds in Danvers. At the table next to us, we’re listening to a 99 year old guy (gonna be an even 100 next month!) come over and start chatting up a group of 80-something women.
1 28-ounce can whole San Marzano tomatoes, certified D.O.P. if possible
1/4 cup extra-virgin olive oil
7 garlic cloves, peeled and slivered
Pinch of crushed red pepper flakes
1 teaspoon kosher salt
1 large fresh basil sprig, or 1/4 teaspoon dried oregano, more to taste
Steps
Pour the tomatoes into a bowl and crush them with your hands
Afterwards, fill the can about 1/4 to 3/4 way with water; slosh around to capture the tomato juices and bits, and set aside for a moment.
Use more water if you want a lot of sauce, or are finishing meatballs, or want it to simmer for a long time. Use less water if you don’t have much time
Slice the garlic cloves as fine as you can
Put the pan on medium heat and add the olive oil
When the olive oil starts to shimmer, toss in the garlic and let it sizzle
BEFORE the garlic starts to brown, pour in the tomatoes, followed by the water from the can, and sprinkle on the oregano and pepper flakes. If you’re using fresh basil, lay it on top.
Turn down the heat and let the sauce simmer for 30 minutes to an hour. It will get a nice orange-y color to the top. You can reduce it until there’s no visible water, but no more than that – remove it from the heat if you reach that point!
Notes
This recipe is great because it’s tasty and doesn’t take a lot of extra work, but it does take time. Expect prep plus cooking to be an hour.
You really want to use a heavy stainless pan, 12″ or larger.
Our local grocery store carries canned whole San Marzano tomatoes, and they are certified D.O.P., but they already have basil added (so we don’t actually put additional basil in).
I’ve tried using canned crushed tomatoes but it messes with the texture and flavor. Crushing them yourself is easy yet so satisfying.
Our best experience was making meatballs at the same time, and finishing them off in the sauce. The sauce picked up some extra flavors that made it sublime.
diced peppers (two colors, at least, for the pretty)
Mexi-cheese
What is a glug, you ask?Tip over the jug, and stop pouring when it has made the glug noise the stated number of times. Yes, it is a technical term!
Directions:
Pre-heat the oven to 350.
Mix all 12 eggs and the cream in a bowl using a whisk or a fork. It should get a little frothy, but not too bad.
Pull out a muffin pan, and either spray the cups with cooking spray, or use cupcake papers (which is what I do because my muffin pans are ancient and rusty).
Pour a roughly equal amount of egg/cream mixture into each cup.
Drop some of the peppers into each cup.
Drop a good-sized pinch of Mexi-cheese (or the shredded cheese of your choice) into each cup.
Bake for 20 to 25 minutes.
Understand – these are all guidelines. You don’t need to use peppers (asparagus is yummy), or Mexi-cheese. If you can’t handle dairy, coconut oil is a great substitute. Try things! Make mistakes! Enjoy!