Bypassing a Tunnel-Broker IPv6 Address For Netflix

Surprisingly, it worked beautifully… that is, until I discovered an unintended side effect

My ISP is pretty terrible but living in the United States, as I do, effectively makes internet service a regional monopoly.  In my case, not only do I pay too much for service but certain websites (cough google.com cough) are incredibly slow for no reason other than my ISP is a dick and won’t peer with them properly.

This particular ISP, despite being very large, has so far refused to roll out IPv6.  This was annoying until I figured out that I could use this to my advantage.  If they won’t peer properly over IPv4, maybe I can go through a tunnel broker to get IPv6 and route around them.  Surprisingly, it worked beautifully.  GMail has never loaded so fast at home.

It was beautiful, that is, until I discovered an unintended side effect: Netflix stopped working.

netflix error: you seem to be using an unblocker or proxy
Despite my brokered tunnel terminating inside the United States, Netflix suspects me of coming from outside the United States.

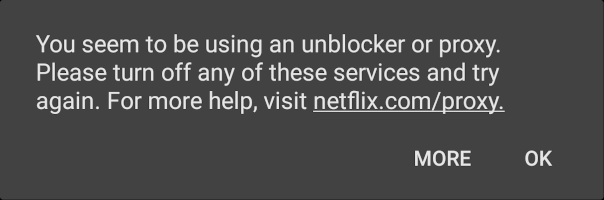
A quick Google search confirmed my suspicion.  Netflix denies access to known proxies, VPNs, and, sadly, IPv6 tunnel brokers.  My brave new world was about to somewhat less entertaining if I couldn’t fix this.

Background

Normally a DNS lookup returns both A (IPv4) and AAAA (IPv6) records together:

$ nslookup google.com
Server:     192.168.1.2
Address:    192.168.1.2#53

Non-authoritative answer:
Name:   google.com
Address: 172.217.12.142
Name:   google.com
Address: 2607:f8b0:4006:819::200e

Some services will choose to provide multiple addresses for redundancy; if the first address doesn’t answer then your computer will automatically try the next in line.

Netflix in particular will return a large number of addresses:

$ nslookup netflix.com 8.8.8.8
Server: 8.8.8.8
Address: 8.8.8.8#53

Non-authoritative answer:
Name: netflix.com
Address: 54.152.239.3
Name: netflix.com
Address: 52.206.122.138
Name: netflix.com
Address: 35.168.183.177
Name: netflix.com
Address: 54.210.113.65
Name: netflix.com
Address: 52.54.154.226
Name: netflix.com
Address: 54.164.254.216
Name: netflix.com
Address: 54.165.157.123
Name: netflix.com
Address: 107.23.222.64
Name: netflix.com
Address: 2406:da00:ff00::3436:9ae2
Name: netflix.com
Address: 2406:da00:ff00::6b17:de40
Name: netflix.com
Address: 2406:da00:ff00::34ce:7a8a
Name: netflix.com
Address: 2406:da00:ff00::36a5:f668
Name: netflix.com
Address: 2406:da00:ff00::36a5:9d7b
Name: netflix.com
Address: 2406:da00:ff00::23a8:b7b1
Name: netflix.com
Address: 2406:da00:ff00::36d2:7141
Name: netflix.com
Address: 2406:da00:ff00::36a4:fed8

The Solution

The key is to have your local DNS resolver return A records, but not AAAA, if (and only if) it’s one of Netflix’s hostnames.

Before I document the solution, it helps to know my particular setup and assumptions:

  • IPv6 via a tunnel broker
  • BIND’s named v9.14.8

Earlier versions of BIND are configured somewhat differently: you may have different options, or (if it’s a really old build) you may need to run two separate named instances.  YMMV.

Step 0: Break Out Your Zone Info (optional but recommended)

If your zone info is part of named.conf you really should put it into it’s own file for easier maintenance and re-usability. The remaining instructions won’t work, without modification, if you don’t.

# /etc/bind/local.conf
zone "." in {
        type hint;
        file "/var/bind/named.cache";
};

zone "localhost" IN {
        type master;
        file "pri/localhost.zone";
        notify no;
};

# 127.0.0. zone.
zone "0.0.127.in-addr.arpa" {
        type master;
        file "pri/0.0.127.zone";
};

Step 1: Add a New IP Address

You can run a single instance of named but you’ll need at least two IP addresses to handle responses.

In this example the DNS server’s “main” IP address is 192.168.1.2 and the new IP address will be 192.168.1.3.

How you do this depends on your distribution. If you’re using openrc and netifrc then you only need to modify /etc/conf.d/net:

# Gentoo and other netifrc-using distributions
config_eth0="192.168.1.2/24 192.168.1.3/24"

Step 2: Listen To Your New Address

Add your new IP address to your listen-on directive, which is probably in /etc/bind/named.conf:

listen-on port 53 { 127.0.0.1; 192.168.1.2; 192.168.1.3; };

It’s possible that your directive doesn’t specify the IP address(es) and/or you don’t even have a listen-on directive – and that’s ok. From the manual:

The server will listen on all interfaces allowed by the address match list. If a port is not specified, port 53 will be used… If no listen-on is specified, the server will listen on port 53 on all IPv4 interfaces.

https://downloads.isc.org/isc/bind9/9.14.8/doc/arm/Bv9ARM.ch05.html

Everything I just said also applies to listen-on-v6.

Step 3: Filter Query Responses

Create a new file called /etc/bind/limited-ipv6.conf and add the following at the top:

view "internal-ipv4only" {
        match-destinations { 192.168.1.3; };
        plugin query "filter-aaaa.so" {
                # don't return ipv6 addresses
                filter-aaaa-on-v4 yes;
                filter-aaaa-on-v6 yes;
        };
};

What this block is saying is, if a request comes in on the new address, pass it through the filter-aaaa plugin.

We’re configuring the plugin to filter all AAAA record replies to ipv4 clients (filter-aaaa-on-v4) and ipv6 clients (filter-aaaa-on-v6).

Now add a new block after the first block, or modify your existing default view:

# forward certain domains back to the ipv4-only view
view "internal" {
        include "/etc/bind/local.conf";

        # AAAA zones to ignore
        zone "netflix.com" {
                type forward;
                forward only;
                forwarders { 192.168.1.3; };
        };
};

This is the default view for internal clients. Requests that don’t match preceding views fall through here.

We’re importing the local zone from step 0 (so we don’t have to maintain two copies of the same information), then forwarding all netflix.com look-ups to the new IP address, which will be handled by the internal-ipv4only view.

Step 4: Include the New Configuration File

Modify /etc/bind/named.conf again, so we’re loading the new configuration file (which includes local.conf).

#include "/etc/bind/local.conf";
include "/etc/bind/limited-ipv6.conf";

Restart named after you make this change.

Testing

nslookup can help you test and troubleshoot.

In the example below we call the “normal” service and get both A and AAAA records, but when we call the ipv4-only service we only get A records:

$ nslookup google.com 192.168.1.2
Server:         192.168.1.2
Address:        192.168.1.2#53

Non-authoritative answer:
Name:   google.com
Address: 172.217.3.110
Name:   google.com
Address: 2607:f8b0:4006:803::200e

$ nslookup google.com 192.168.1.3
Server:         192.168.1.3
Address:        192.168.1.3#53

Non-authoritative answer:
Name:   google.com
Address: 172.217.3.110


Setting up a Gentoo-Based Dual-Stack Router

Our network has been based around a home-built router for quite some time, ever since I got fed up with the crappy ActionTec router that Verizon bundled with our FiOS service. (If you’re going to offer high-speed internet, you should probably bundle equipment that can actually keep up.) I had originally followed a slightly older version of these instructions to get a nice basic router going. But I finally wanted better. I wanted the bright, shiny, new thing. I wanted IPv6.

So, here’s my instructions for going from an existing IPv4 router to dual-stack IPv4/6.

Note: I am using dnsmasq for DNS and DHCP, hostapd for wireless management, and an iptables firewall. Since Verizon still doesn’t widely support consumer IPv6, I’m using a tunnel broker to get my /6 address. If you’re using a different setup your mileage may vary. If you find anything that I appear to have forgotten, please let me know!

Step 1: Recompile the Kernel

This should be obvious: if you want to run ipv6 you need ipv6 support in your kernel. In order to trim as much off my kernel as possible I did not have it built in, and had to recompile.

You should also add netfilter support for ipv6 so that your firewall will work.

Networking support  --->
    Networking options  --->
        <*>   The IPv6 protocol  --->
            <*>   IPv6: IPv6-in-IPv4 tunnel (SIT driver)
        [*] Network packet filtering framework (Netfilter)  --->
            IPv6: Netfilter Configuration  --->
                <M> IPv6 NAT
                <M> IP6 tables support (required for filtering)
                <M>   Packet filtering
                <M>   ip6tables NAT support
                <M>     MASQUERADE target support
                ... other filtering options as you may need for your situation

Step 2: Update Your IPv6 Support

Again, it was never compiled in, in order to trim off unused bits of code. Add ‘ipv6’ to your USE variable and emerge --newuse world

Step 3: Install network tools (if they aren’t already)

emerge --noreplace sys-apps/iproute2 net-firewall/iptables

Step 4 (optional): Set up your tunnel

If your ISP doesn’t provide ipv6, and many don’t, you need to request an address range from a tunnel broker. I’m using Hurricane Electric, which is free, but there are others — see this list or just google it.

If you have multiple machines on your network (which is assumed, since this is a router guide), you may prefer a /48, so that autoconfig works nicely, instead of the default /64. This guide assumes a /48.

Going forward, replace 2001:470:891a: with your own /48 range.

Now activate your tunnel:

ip tunnel add he-ipv6 mode sit remote 1.2.3.4 local 5.6.7.8 ttl 255
ip link set he-ipv6 up
ip addr add 2001:470:1f06:2a3::2/64 dev he-ipv6
ip route add ::/0 dev he-ipv6
ip -f inet6 addr

Step 5: Update Your Net Config

I have two wired and one wireless card in my router. Here’s what my /etc/conf.d/net looks like:

# enp2s0 is my exterior wired nic (aka public facing)
# enp3s5 is my interior wired nic
# wlp3s6 is my interior wireless nic

dhcp_enp2s0="nodns" # we choose our own DNS, tyvm

config_enp3s5="192.168.0.1/24 2001:470:891a:0::/64"

modules_wlp3s6="!iwconfig !wpa_supplicant"
config_wlp3s6="192.168.1.1/24 2001:470:891a:1::/48"
dns_servers_wlp3s6="127.0.0.1"

After making appropriate changes, restart your NICs. If you’re working remotely, you may want to be connected via two paths instead of just one (so when you inevitably get bounced and can’t reconnect, you still have a way back in).

A properly-configured set of addresses looks like this:

# ip addr
1: lo: &lt;LOOPBACK,UP,LOWER_UP&gt; mtu 65536 qdisc noqueue state UNKNOWN group default
    link/loopback 00:00:00:00:00:00 brd 00:00:00:00:00:00
    inet 127.0.0.1/8 brd 127.255.255.255 scope host lo
       valid_lft forever preferred_lft forever
    inet6 ::1/128 scope host
       valid_lft forever preferred_lft forever
2: enp2s0: &lt;BROADCAST,MULTICAST,UP,LOWER_UP&gt; mtu 1500 qdisc pfifo_fast state UP group default qlen 1000
    link/ether 00:e0:4d:bf:03:f5 brd ff:ff:ff:ff:ff:ff
    inet 108.20.118.17/24 brd 108.20.118.255 scope global enp2s0
       valid_lft forever preferred_lft forever
    inet6 fe80::cbdf:25c0:c948:f4bb/64 scope link
       valid_lft forever preferred_lft forever
3: enp3s5: &lt;BROADCAST,MULTICAST,UP,LOWER_UP&gt; mtu 1500 qdisc pfifo_fast state UNKNOWN group default qlen 1000
    link/ether 00:04:5a:42:a6:98 brd ff:ff:ff:ff:ff:ff
    inet 192.168.0.1/24 brd 192.168.0.255 scope global enp3s5
       valid_lft forever preferred_lft forever
    inet6 2001:470:891a::/64 scope global
       valid_lft forever preferred_lft forever
    inet6 fe80::204:5aff:fe42:a698/64 scope link
       valid_lft forever preferred_lft forever
4: wlp3s6: &lt;BROADCAST,MULTICAST,UP,LOWER_UP&gt; mtu 1500 qdisc mq state UP group default qlen 1000
    link/ether 00:1a:ef:07:4d:a7 brd ff:ff:ff:ff:ff:ff
    inet 192.168.1.1/24 brd 192.168.1.255 scope global wlp3s6
       valid_lft forever preferred_lft forever
    inet6 2001:470:891a:1::/64 scope global
       valid_lft forever preferred_lft forever
    inet6 fe80::21a:efff:fe07:4da7/64 scope link
       valid_lft forever preferred_lft forever
5: sit0@NONE:  mtu 1480 qdisc noop state DOWN group default
    link/sit 0.0.0.0 brd 0.0.0.0
6: he-ipv6@NONE: &lt;POINTOPOINT,NOARP,UP,LOWER_UP&gt; mtu 1480 qdisc noqueue state UNKNOWN group default
    link/sit 108.20.118.17 peer 209.51.161.14
    inet6 2001:470:1f06:2a3::2/64 scope global
       valid_lft forever preferred_lft forever
    inet6 fe80::6c14:7611/64 scope link
       valid_lft forever preferred_lft forever

Test it with a ping:

ping6 www.kame.net

Step 6: Reconfigure dnsmasq

You’ll need to add router advertisments and your new addresses. Rather than hard-coding an address, dnsmasq offers a ‘constructor’ label which figures it out automatically. Here’s the relevant section from my /etc/dnsmasq.conf:

domain-needed
bogus-priv
domain=jonesling.us
dhcp-authoritative
enable-ra
dhcp-range=192.168.0.20,192.168.0.100,12h
dhcp-range=192.168.1.20,192.168.1.100,12h
dhcp-range=192.168.2.20,192.168.2.100,12h
dhcp-range=::,constructor:enp3s5,ra-names,slaac,12h
dhcp-range=::,constructor:wlp3s6,ra-names,slaac,12h
resolv-file=/etc/resolv.dnsmasq
selfmx
enable-ra

And restart it: /etc/init.d/dnsmasq restart

Step 7: Configure your firewall

Pretty much every iptables reference in your firewall config will be mirrored with an ip6tables command.

Here’s my script to set up iptables (if you see an error or something stupid, I would appreciate your criticism – paired with your reasoning on why it should be changed so I can know better for next time).

#!/bin/bash
# based on http://www.gentoo.org/doc/en/home-router-howto.xml

# set to '0' to lock the kids out
OPEN_INTERNET=1

# these systems can get shut out when OPEN_INTERNET isn't true
declare -a NO_SURFING=( 'wii-u'
                        'kids-computer'
                      )

# these systems never get shut out
declare -a OK_SURFING=( 'parents-computer'
                        'parents-phone'
                      )

# these ports take precedence over CLOSED_PORTS
declare -a OPEN_TCP_PORTS=( 'ssh'
                            'http'
                            'mail'
                            'submission'
                          )

declare -a OPEN_UDP_PORTS=( 'submission' )

# if the port is meant to be closed, we close tcp *AND* udp
declare -a CLOSED_PORTS=( '0:1055'
                          'svn'
                          'distcc'
                          'x11'
                          'nfs'
                          'icpv2'
                          'mysql'
                          'rtsp'
                          '3128' # squid
                          '3130' # squid ICP
                          '3551' # nisport
                        )

declare -a LAN_SERVICES=( "svn" )

# blacklisted IPs and ranges
# http://www.iana.org/assignments/ipv4-address-space/ipv4-address-space.xhtml
declare -a IP_BLACKLIST=( # APINIC
                          # AFRINIC
                          # LACNIC
                          ...
                        )

LAN=enp3s5
WLAN=wlp3s6
WAN=enp2s0
SIT=he-ipv6

INSIDE=( $LAN $WLAN )

LOCAL_RANGE_IPV4='192.168.0.0/16'
LOCAL_RANGE_IPV6='2001:470:891a::'

# First we flush our current rules
iptables -F
iptables -t nat -F
ip6tables -F
ip6tables -t nat -F

# Setup default policies to handle unmatched traffic
iptables  -P INPUT ACCEPT
iptables  -P OUTPUT ACCEPT
iptables  -P FORWARD DROP
ip6tables -P INPUT ACCEPT
ip6tables -P OUTPUT ACCEPT
ip6tables -P FORWARD DROP

# Then we lock our services so they only work from the LAN
iptables  -I INPUT 1 -i ${LAN}  -j ACCEPT
iptables  -I INPUT 1 -i ${WLAN} -j ACCEPT
iptables  -I INPUT 1 -i lo      -j ACCEPT
ip6tables -I INPUT 1 -i ${LAN}  -j ACCEPT
ip6tables -I INPUT 1 -i ${WLAN} -j ACCEPT
ip6tables -I INPUT 1 -i lo      -j ACCEPT

# block members of IP_BLACKLIST, plus any addresses passed in on the
# command line
for IP in ${IP_BLACKLIST[@]} ; do
    iptables -I INPUT -s ${IP} -p TCP --dport ssh -j DROP
done

for IP in $@; do
    iptables -I INPUT -s ${IP} -d 0/0 -j REJECT
done

iptables  -A INPUT -p UDP --dport bootps -i ${WAN} -j REJECT
ip6tables -A INPUT -p UDP --dport bootps -i ${SIT} -j REJECT
iptables  -A INPUT -p UDP --dport domain -i ${WAN} -j REJECT
ip6tables -A INPUT -p UDP --dport domain -i ${SIT} -j REJECT

# Explicitly allow access to services on the WAN
for SERVICE in ${LAN_SERVICES[@]} ; do
    for IFACE in ${INSIDE[@]} ; do
        iptables  -A INPUT -p TCP --dport svn -i ${IFACE} -j ACCEPT
        iptables  -A INPUT -p UDP --dport svn -i ${IFACE} -j ACCEPT
        ip6tables -A INPUT -p TCP --dport svn -i ${IFACE} -j ACCEPT
        ip6tables -A INPUT -p UDP --dport svn -i ${IFACE} -j ACCEPT
    done
done

# Allow access to our server from the WAN
for PORT in ${OPEN_TCP_PORTS[@]} ; do
    iptables  -A INPUT -p TCP --dport $PORT -i ${WAN} -j ACCEPT
    ip6tables -A INPUT -p TCP --dport $PORT -i ${SIT} -j ACCEPT
done

for PORT in ${OPEN_UPD_PORTS[@]} ; do
    iptables  -A INPUT -p UDP --dport PORT -i ${WAN} -j ACCEPT
    ip6tables -A INPUT -p UDP --dport PORT -i ${SIT} -j ACCEPT
done

# Drop TCP / UDP packets to privileged ports
for PORT in ${CLOSED_PORTS[@]} ; do
    iptables  -A INPUT -p TCP -i ${WAN} -d 0/0 --dport ${PORT} -j DROP
    ip6tables -A INPUT -p TCP -i ${SIT} -d 0/0 --dport ${PORT} -j DROP

    iptables  -A INPUT -p UDP -i ${WAN} -d 0/0 --dport ${PORT} -j DROP
    ip6tables -A INPUT -p UDP -i ${SIT} -d 0/0 --dport ${PORT} -j DROP
done

iptables  -I FORWARD -i ${LAN} -d $LOCAL_RANGE_IPV4 -j ACCEPT
iptables  -A FORWARD -i ${LAN} -s $LOCAL_RANGE_IPV4 -j ACCEPT
ip6tables -I FORWARD -i ${LAN} -d $LOCAL_RANGE_IPV6 -j ACCEPT
ip6tables -A FORWARD -i ${LAN} -s $LOCAL_RANGE_IPV6 -j ACCEPT

if (( OPEN_INTERNET )); then
    echo 'yay, everybody gets internet'
    iptables  -I FORWARD -i ${WLAN} -d $LOCAL_RANGE_IPV4 -j ACCEPT
    iptables  -A FORWARD -i ${WLAN} -s $LOCAL_RANGE_IPV4 -j ACCEPT
    ip6tables -I FORWARD -i ${WLAN} -d $LOCAL_RANGE_IPV6 -j ACCEPT
    ip6tables -A FORWARD -i ${WLAN} -s $LOCAL_RANGE_IPV6 -j ACCEPT
else
    echo "boo, only ${OK_SURFING[@]} get internet"
    for IP in ${OK_SURFING[@]}; do
        iptables -I FORWARD -i ${WLAN} -d $IP/255.255.255.255 -j ACCEPT
        iptables -A FORWARD -i ${WLAN} -s $IP/255.255.255.255 -j ACCEPT
    done
fi

iptables  -A FORWARD -i ${WAN} -d $LOCAL_RANGE_IPV4 -j ACCEPT
ip6tables -A FORWARD -i ${WAN} -d $LOCAL_RANGE_IPV6 -j ACCEPT

iptables  -t nat -A POSTROUTING -o ${WAN} -j MASQUERADE
ip6tables -t nat -A POSTROUTING -o ${SIT} -j MASQUERADE

# This is so when we boot we don't have to run the rules by hand
/etc/init.d/iptables save
/etc/init.d/ip6tables save

# fail2ban should be reloaded after flushing iptables
/etc/init.d/fail2ban reload

Step 8: Update your DNS

Add a AAAA record to your domain’s DNS record.  You may have to keep this one up-to-date yourself.

Interesting to note: you might be thinking “crap, what’s the ipv6 equivalent of these CNAME records?”  Stop worrying, there isn’t.  The CNAME is read like normal, but ipv6 clients will then look up the AAAA (instead of the A) record of the destination host.  It just works.

What?  You built your own router but you don’t have your own domain?  WTF is wrong with you?

Step 9: Reboot your clients

While I was working, I made a bunch of mistakes and my clients had multiple ipv6 addresses – making networking from them unstable as they didn’t necessarily know which address to use. Rebooting will clear them – and make sure your config is proper.

At this point your clients should be in ipv6 and you’re gonna be all excited to see if work.  Browsers take ipv6 addresses a little differently: http://[2001:470:1f06:2a3::2]/

IPv6

If you’re white and nerdy, like me, you know that your small victories aren’t like other peoples’ small victories.  Today’s small victory is IPv6.

I has it.

At this very moment, this blog can be served to you, or may already be served to you, over IPv6 if you have it too.

Setting it up on your home-built router isn’t straight-forward, especially if your ISP doesn’t offer IPv6 – you have to find a tunnel broker.  (I’m using Hurricane Electric, which provides free /64 and /48 tunnels.)  Clients seem to work fairly automatically.  Have fun figuring out all the little things you need to tweak on your router, though.

Things to note:

  • hostapd seems to knock off the IPv6 address of your wireless NIC when you start it – you need to re-add the address by hand, like this:
    ifconfig wlp3s6 inet6 add 2001:470:891a::/48
  • dnsmasq has a special tag to automatically read addresses from devices, called ‘constructor’, which is easier than copying your dynamic tunnel everywhere:
    dhcp-range=::,constructor:wlp3s6,ra-names,slaac,12h
  • You may use the IPv6 equivalent of ‘private’ IP addresses, but you don’t need to anymore.
  • dyn.com hides their non-typical DNS record types, and you have to enable the ‘expert interface’ to see AAAA and other record types, but otherwise there’s no difference in setting up dynamic host addressing.
    • One quirk that may not be immediately obvious: You don’t need to have separate IPv6 CNAME records.  An IPv6 client will check the CNAME, pull the destination hostname, then pull the AAAA record.
  • Most network tools have IPv6 equivalents – ping doesn’t work with IPv6 addresses, but ping6 does.
  • There’s a special format for using an IPv6 address in a web browser: http://[2001:470:1f06:2a3::2]/ if you go direct to the blog’s ipv6 address today.

But besides all that, it really works!

$ ping6 -c1 jonesling.us
PING jonesling.us(quinnjones-2-pt.tunnel.tserv4.nyc4.ipv6.he.net) 56 data bytes
64 bytes from quinnjones-2-pt.tunnel.tserv4.nyc4.ipv6.he.net: icmp_seq=1 ttl=64 time=0.508 ms

--- jonesling.us ping statistics ---
1 packets transmitted, 1 received, 0% packet loss, time 0ms
rtt min/avg/max/mdev = 0.508/0.508/0.508/0.000 ms